With NordLocker, you can store, manage and share individual files. Learn how with this step-by-step guide.
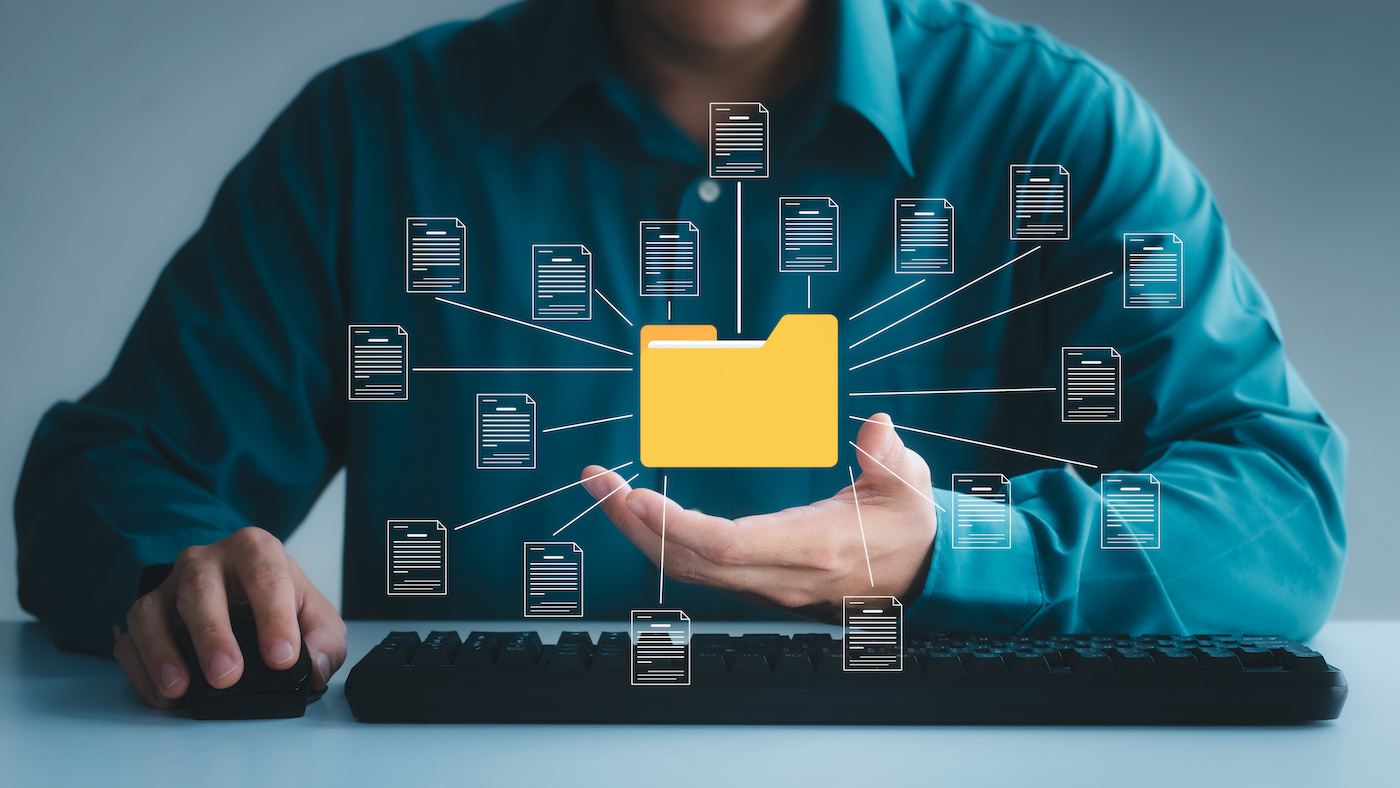
If you’re looking for a secure place to store, manage and share files in the cloud, one option is NordLocker.
With a free or paid NordLocker account, you can secure your cloud storage with both a regular password and a master password. After uploading the files you wish to store, you’re able to move, rename, delete and download any file. Plus, you can now easily share a file with another person by generating a link to it and sending a security code. Here’s how this works.
Jump to:
NordLocker’s pricing plans
NordLocker offers several personal and business plans with different prices and features.
- Free: The free plan limits you to 3GB of online storage and offers email support.
- Personal: Priced at $7.99 a month or $35.88 a year, the Personal plan gives you 500GB of storage with 24/7 priority support.
- Personal Plus: At $19.99 a month or $83.88 a year, the Personal Plus plan allocates 2TB of storage.
- Business: For $12.99 a month or $107.88 a year, the Business plan gives you 500GB of storage with access control via an admin plan and other business-related features.
- Business Plus: At $18.99 a month or $179.88 a year, the Business Plus plan offers the same features as the Business plan but grants you 2TB of online storage.
Each plan provides end-to-end encryption, so your data is protected in transit, at rest and when you share it. Encrypted files can be as large as 8GB.
SEE: Software usage policy (TechRepublic Premium)
How to sign in or sign up for a NordLocker account
If you already have an account with NordLocker, browse to the home page, click the Log in link at the top and sign in with your credentials.
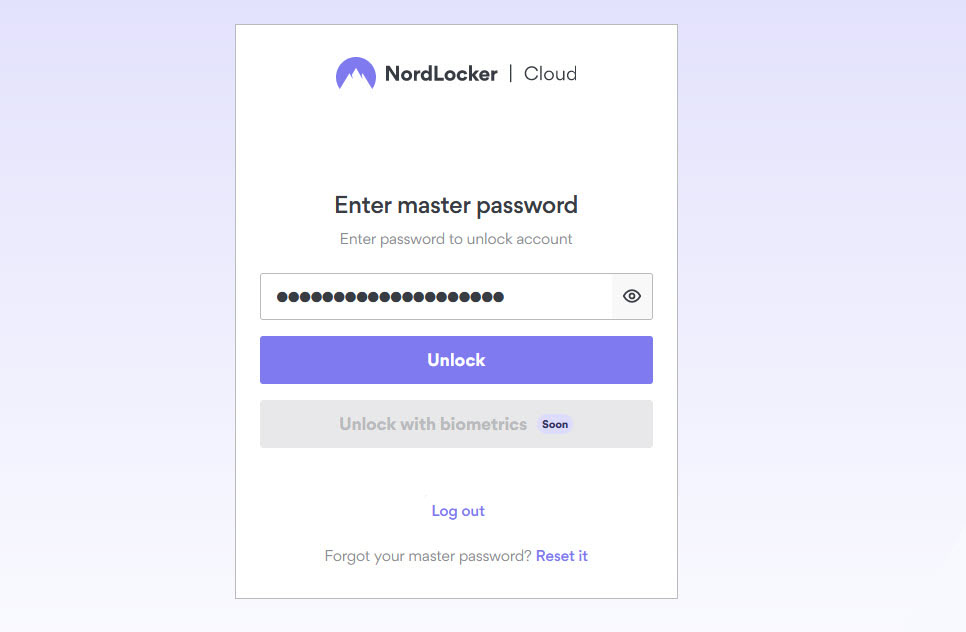
If you don’t already have an account, head to the Sign up page. Enter your email address and respond to the verification email. Next, create your account password, and then, create a master password to further secure your files (Figure A).
Figure A
How to create a locker in NordLocker
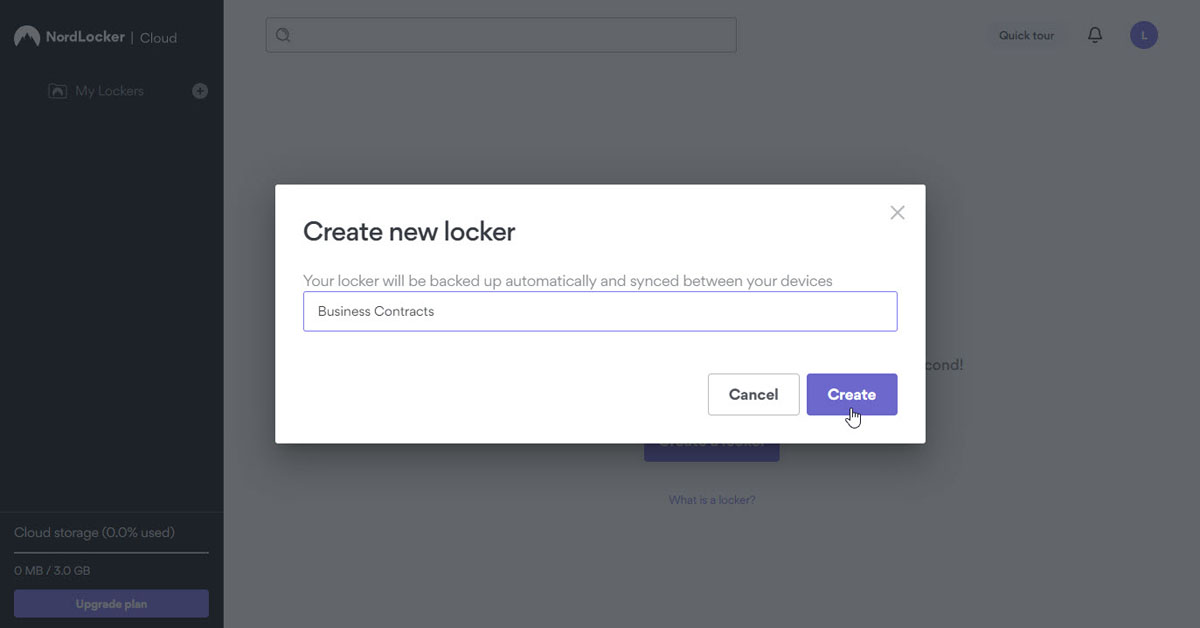
If you’re using NordLocker for the first time, you’ll need to create a locker in which to securely store your online files. You can create as many lockers as you need, with each one housing different types of files.
Click the button for Create a locker. Type a name for the locker, and then, click Create (Figure B).
Figure B
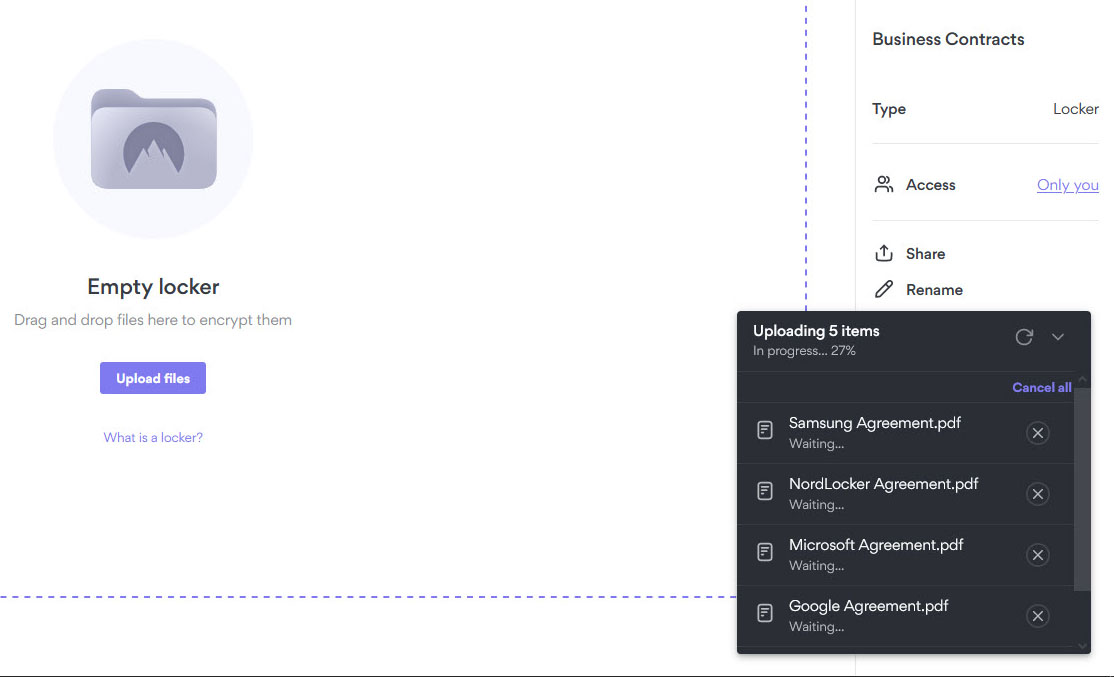
Add files
Next, add the files you wish to store in your locker. Either drag and drop them from your PC onto the locker window, or click the Upload files button, and select them from File Explorer (Figure C).
Figure C
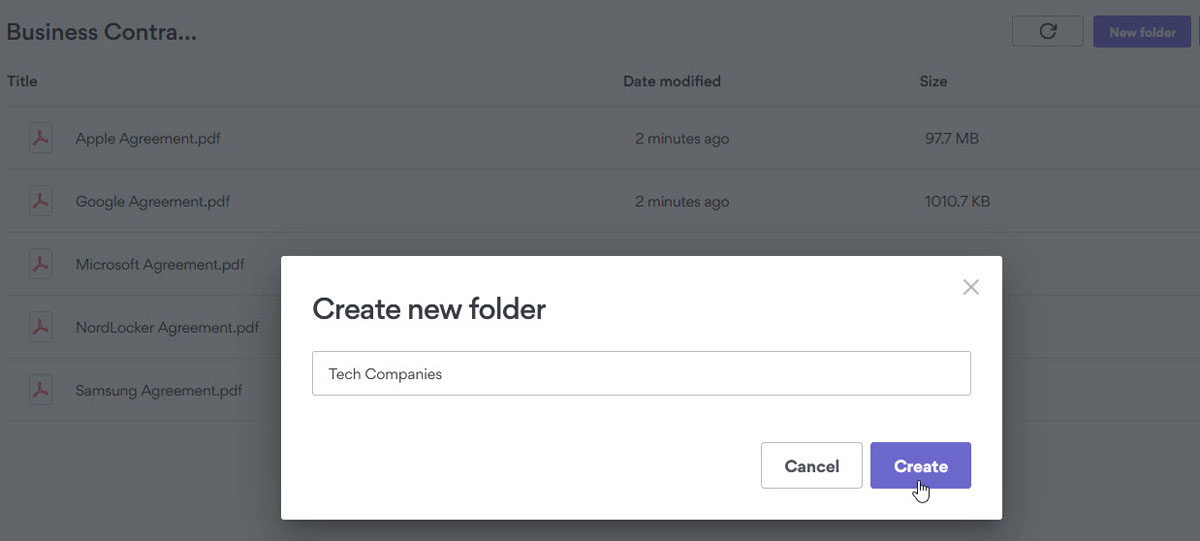
Create folders
The uploaded files are automatically encrypted. You can organize files within a locker by creating a folder.
Click the New folder button at the top. Name your folder, and then, click Create (Figure D).
Figure D
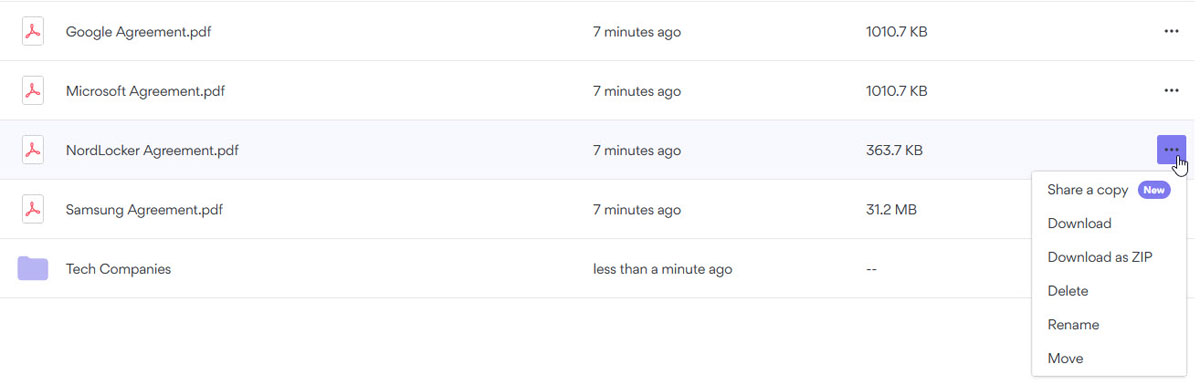
How to manage files in NordLocker
Click a specific file to view it. To manage a file, click its ellipsis icon, and select an action from the following menu dropdown:
- Move to move the file into a specific folder.
- Rename to give the file a new name.
- Delete to remove the file.
- Download to download a copy of the file to your computer.
- Download as ZIP to download a compressed copy of the file (Figure E).
Figure E
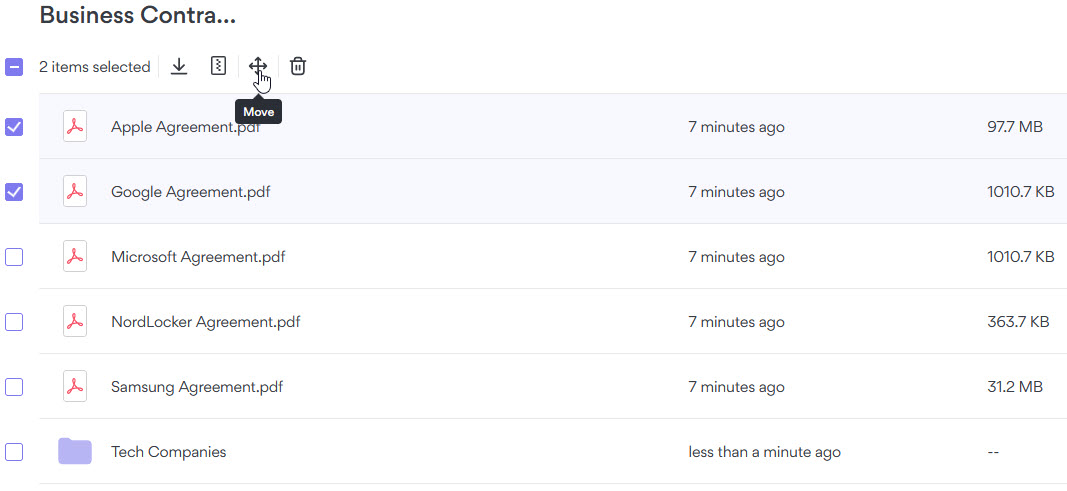
You can also run certain commands on multiple files by selecting two or more files and choosing an action from the top toolbar:
- Download or Download as ZIP to download the selected files to your PC.
- Move to move them into a specific folder.
- Delete to remove them (Figure F).
Figure F
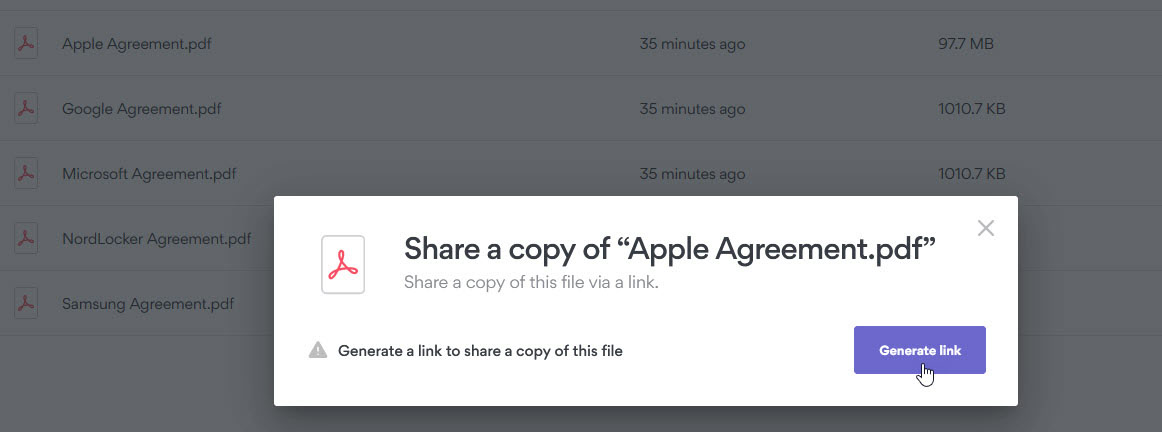
How to share files in NordLocker
One of the newest options with NordLocker is the ability to share a copy of a file with someone else. For this, click the ellipsis icon next to the file you wish to share, and select Share a copy. Click the Generate link button to create a link to access the file (Figure G).
Figure G
In response, NordLocker displays a link to the file as well as a security code required to access the file.
Click the Copy button to copy the link, and then, do the same for the security code (Figure H). Next, you’ll need to send the link to the file and the security code to anyone with whom you want to share the file.
Figure H

NordLocker advises using separate methods to share the file link and the security code. Note that the people you want to access the file do not need their own NordLocker accounts.
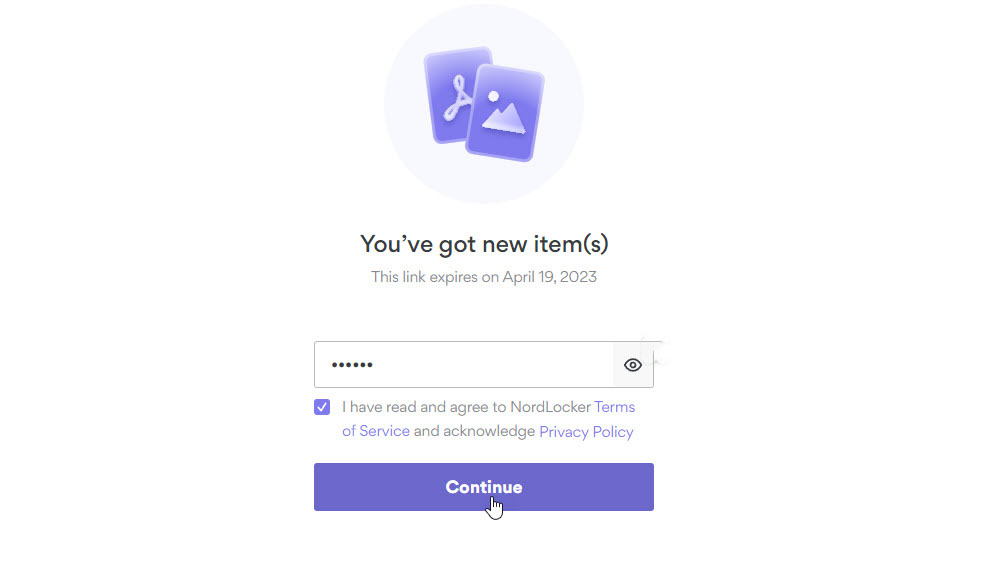
After accessing the link, your recipient or recipients must enter the security code to gain access and then click Continue (Figure I).
Figure I
The name of the file appears in NordLocker where the person can view it online or download it to their device. By default, the link expires after two weeks.